Get ready to elevate your game night with a custom-built bubble hockey table! As an avid fan of this beloved arcade game, I know how expensive purchasing one can be. That’s why I’ve perfected the art of building my own, and now I’m sharing my step-by-step guide with you!
In this DIY tutorial, we’ll cover everything from materials needed, to assembly instructions, and even tips for personalizing your table. By the end of this article, you’ll have all the knowledge and confidence to build your very own bubble hockey table at a fraction of the cost.
Whether you’re looking for a fun project to do with friends or want to surprise your family with an exciting addition to your game room, building your own bubble hockey table is sure to bring hours of fun and competition. So let’s grab our tools and get started on creating the ultimate gaming experience!
So, build your own bubble hockey table?
It is possible to make your own bubble hockey table with a few materials and some basic tools. Bubble hockey, also known as rod hockey or dome hockey, is a popular arcade game that simulates ice hockey on a smaller scale. It typically consists of two players controlling rods with figures attached to them in order to move the puck and score goals.
To build your own bubble hockey table, you will need:
1. A large piece of plywood or MDF board for the playing surface
2. Wooden boards for the frame
3. Plexiglass or clear plastic sheet for the dome
4. Hockey stick handles and bolts (to attach the player figures)
5. Screws, nails, and wood glue
6. Drill and saw (or access to one)
Step 1: Plan Your Design
Decide on the size and shape of your bubble hockey table based on available space and personal preference.
Step 2: Cut Out Playing Surface
Using a saw, cut out a rectangular piece from your chosen material for the playing surface.
Step 3: Build The Frame
Construct a frame using wooden boards around the edges of your playing surface using screws or nails.
Step 4: Attach Player Figures
Drill holes into each end of the wooden rods/sticks that will serve as handles for moving players back-and-forth on their respective sides.
Next drill small holes into each player figure’s base.
Attach player figures onto sticks by inserting bolts through drilled holes in both pieces then secure tightly with nuts.
Step 5: Add Dome
Place plexiglass sheet over top of frame so that it covers entire play area.
Securely attach dome by screwing it onto top edges of frame.
And voila! You now have your very own homemade bubble hockey table ready for hours of fun gameplay! Keep in mind this is just one example – there are many variations you can try depending on your skill level and available materials. Get creative and enjoy the process of building your own unique bubble hockey table!
Materials Required: A Comprehensive List for Building Your Own Bubble Hockey Table
Imagine you’re diving into the world of crafting your very own bubble hockey table, an endeavor that promises not only fun but a unique sense of accomplishment. Before you start cutting and hammering away, you need to gather all the essential materials. First on the list is plywood. This will form the sturdy base and sides of your table. Next, you’ll require some clear acrylic or plexiglass for that iconic dome covering, ensuring an uninterrupted view of the fast-paced action.
Now let’s talk about mechanics. You’ll need rods with bearings for smooth player movements; don’t forget handles for gripping those rods. Player figures can be purchased pre-made or customized if you’re feeling extra creative! For seamless puck gliding, get high-quality playing surface laminate along with a felt or rubberized edge trim to keep pucks in play.
Additionally:
- Electric drill
- Screws and nails
- Wood glue
- A small fan (for airflow)
Finishing touches make all the difference—paint for adding team colors, decals for logos, and perhaps even LED lights to illuminate epic late-night matches. Once you’ve gathered everything from this comprehensive list, you’ll be ready to build a fantastic bubble hockey table that’ll provide countless hours of entertainment!
Read also: de la salle hockey
Assembly Instructions: Detailed Steps on Constructing your Bubble Hockey Table
Putting together your very own bubble hockey table can be quite the adventure! First things first, find a clean and spacious area to work. You’ll want ample room for all the parts and tools you’ll need. Begin by laying out each piece so you have a clear view of what goes where. Read through the instructions carefully; understanding them before you proceed will save time and frustration.
Once you’re familiar with the steps, start with the main frame assembly. Connect the side panels to form a sturdy base. Make sure everything is aligned properly to avoid any wobbling later on. Secure these joints tightly—this is crucial for stability during gameplay! Next up, attach the playing surface by gently placing it into position within this frame. Ensure it’s level, then fasten it securely.
With your base set up, move on to installing player rods and handles:
- Arrange players: Following color patterns or team alignments.
- Add goals: Attach nets at both ends.
- Position scoreboard: Often attached above center ice.
Finally, don’t forget that signature dome cover; it not only adds an aesthetic touch but also keeps gameplay pieces in check during intense matches! Once done, give yourself a pat on the back—you’ve just built something awesome!
Personalizing Your Table: Ideas and Tips for a Unique Bubble Hockey Game Experience
Imagine stepping into a room and seeing your bubble hockey table transformed into a personalized arena. This isn’t just any game night—it’s an **experience**! One of the easiest ways to make your bubble hockey table unique is by customizing the players’ uniforms. You can paint them with your favorite team’s colors, or even better, design jerseys that reflect inside jokes or family memories. Not only does this add a personal touch, but it also sparks conversations and creates lasting memories.
Another fantastic idea is to work on the surroundings of your bubble hockey table. How about adding thematic decorations? Think mini LED lights outlining the edges for evening games or small banners hanging nearby celebrating past victories. If you’re feeling particularly creative, consider crafting some DIY scoreboards using old picture frames and chalkboards for that vintage look. These little details don’t take much effort but can drastically change how immersive and enjoyable each match feels.
- Custom player uniforms
- LED lights
- Thematic decorations
- DIY scoreboards
Whether playing with friends or family, these simple yet thoughtful touches will help elevate every session into something truly special.
So go ahead—get crafty and make those game nights unforgettable!
Read also: air hockey on top of pool table
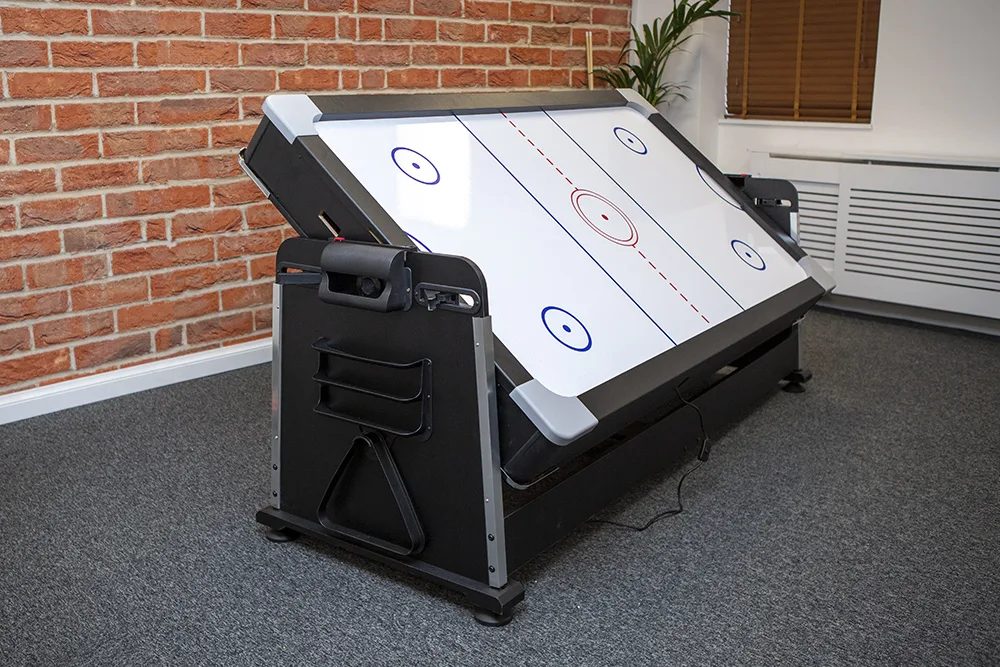 build your own bubble hockey table
Conclusion: Reaping the Rewards from Building Your Own Bubble Hockey Table
Building your own bubble hockey table is more than a weekend project; it’s an adventure filled with rewards. Imagine the joy of transforming raw materials into a game that brings people together. You start with sheets of plywood, metal rods, and plastic players. As you measure, cut, and assemble each piece, there’s a sense of creative satisfaction that grows deeper with every step. Crafting parts to fit perfectly offers moments where time seems to stand still. Every drilled hole or glued joint contributes to something far greater than the sum of its parts—a game table that’s uniquely yours.
When it’s finally finished and ready for play, the real magic happens. Friends and family gather around this tangible fruit of your labor. Kids marvel at the gleaming surface as they eagerly grab their handles for their turn at scoring goals under the dome’s protective shield—no arguments over lost pucks here! Adults reminisce about childhood memories while creating new stories in real-time. The laughter echoes through your home like music composed by teamwork and competition combined beautifully together.
- The pride from building something functional adds incredible value.
- The fun shared multiplies exponentially compared to store-bought versions.
In conclusion, crafting your own bubble hockey table not only enriches personal skills but also strengthens bonds among loved ones who enjoy what you’ve made.
You may also like: stiga table hockey parts