Are you tired of constantly going to the arcade to play air hockey? Want to bring the fun and excitement of this classic game into your own home? Well, I have good news for you! Building your own air hockey table is easier than you think. And not just any ordinary table, but one that is customized to fit your space and style. Follow this step-by-step guide and in no time, you’ll be challenging friends and family to intense air hockey matches from the comfort of your own home!
In this article, I will walk you through the process of building an air hockey table at home, providing detailed instructions and tips along the way. We’ll cover everything from choosing materials and tools, constructing the frame, attaching a playing surface with smooth pucks gliding action, adding scorekeeping features, and more. By the end of this guide, you will have all the knowledge necessary to create your very own professional-level air hockey table right in your living room! So let’s get started on this exciting DIY project!
So, how to build an air hockey table?
Building an air hockey table at home can be a fun and rewarding project for any DIY enthusiast. Not only will you have a unique piece of furniture in your home, but you’ll also have hours of entertainment with friends and family. In this step-by-step guide, we’ll walk you through the process of building your very own air hockey table.
Step 1: Gather Materials
The first step to building an air hockey table is gathering all the necessary materials. You will need:
– A large sheet of plywood (at least 4 feet by 8 feet)
– Four wooden legs or base pieces
– An electric saw
– Screws and screwdriver
– Sandpaper
– Black paint (or any color you prefer)
– White tape or paint for the lines on the table surface
– An air hockey blower motor kit (can be purchased online)
Step 2: Cut The Plywood To Size
Using an electric saw, cut your plywood sheet to measure exactly 4 feet by 8 feet. This will serve as the playing surface for your air hockey table.
Step 3: Build The Base
Next, take your four wooden legs or base pieces and attach them to each corner of the plywood using screws. Make sure they are securely attached so that they can support the weight of the playing surface.
Step 4: Sand And Paint The Surface
Sand down any rough edges on the plywood and then paint it black (or whichever color you prefer). This will serve as a smooth surface for easy puck movement during gameplay.
Step 5: Add Lines To The Table Surface
Using white tape or paint, create two parallel lines across the center lengthwise and two more parallel lines widthwise to divide up the playing area into quarters.
Step 6: Install Air Hockey Blower Motor Kit
Follow the instructions provided with your chosen blower motor kit to install it onto one end of your table. This will create the air cushion that allows the puck to glide smoothly across the surface.
Step 7: Test It Out
Once everything is assembled and in place, it’s time to test out your new air hockey table! Grab a friend or family member and have some fun playing a game of air hockey on your homemade table.
Building an air hockey table at home may seem like a daunting task, but with these simple steps, you’ll have your very own game room addition in no time. Get creative with your design and enjoy endless hours of entertainment with this DIY project.
Choosing the Right Materials and Tools for Your Air Hockey Table
When you’re diving into creating or maintaining an air hockey table, selecting the right materials and tools is crucial for achieving that smooth, fast-paced game we all love. Begin with the playing surface: it needs to be perfectly smooth and durable. Opt for a high-pressure laminate or a sturdy plastic material like polycarbonate. These surfaces provide both strength and minimal friction, ensuring the puck glides seamlessly. Also, don’t overlook the importance of quality pucks and strikers; choose ones made from ABS plastic as they offer durability without sacrificing performance.
Next up are the tools you’ll need to get everything in tip-top shape. A reliable power drill will become your best friend when assembling or adjusting parts of your table. Additionally:
- An Allen wrench set for those intricate bolts.
- A level to guarantee your playing field is even.
- Canned air for keeping those tiny holes unclogged and dust-free.
And don’t forget about proper lighting! LED strip lights underneath can add an extra layer of excitement while also enhancing visibility during play. Taking these steps ensures every game on your air hockey table feels professional—fast-paced fun at its finest!
Read also: best lubricant for air hockey table
Constructing the Frame of Your Homemade Air Hockey Table
Building the frame for your homemade air hockey table is a rewarding and fun project. Start by choosing high-quality wood, such as plywood or MDF. You need sturdy materials to ensure durability and stability during intense games. Begin by cutting four pieces of wood for the outer edges of your frame; these should be even in length to form a rectangle when assembled. Next, secure the corners with screws or brackets, making sure everything is lined up perfectly straight. This foundation will hold the playing surface firmly.
Once you have your basic rectangle set up, add support beams across the middle to prevent sagging over time. These should run parallel to each other and can be spaced about every 12 inches apart depending on your table’s size.
Here are some key steps:
- Measure twice before any cuts.
- Use clamps to hold pieces together while screwing them in place.
- Add corner supports for extra strength.
After you’ve constructed this robust frame, give it a smooth finish by sanding down any rough edges.
This ensures not only an attractive look but also safety from splinters.
The next step involves attaching legs if you’re building a standing model; otherwise,a simple tabletop version works well too!
Your solidly built frame sets the stage for many exciting matches ahead!
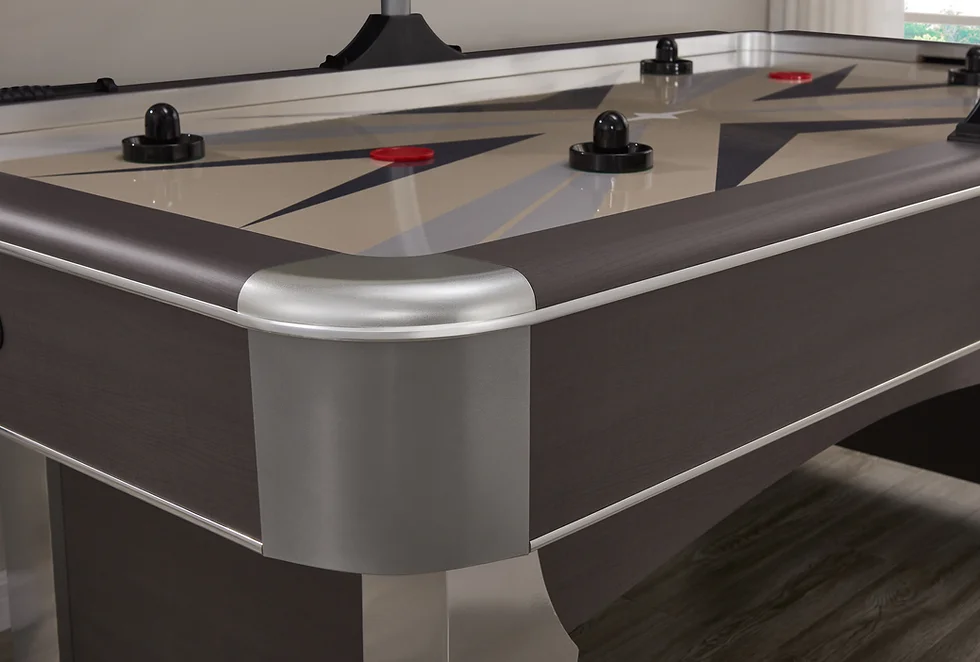
Attaching a Smooth Air Hockey Playing Surface for Optimized Puck Gliding
Having a smooth surface for your air hockey table is essential to keep the puck gliding effortlessly. One of the best ways to achieve this is by using a high-quality, slick material like acrylic or laminate. These materials offer minimal friction and are also durable enough to withstand repeated impact from enthusiastic gameplay.
Additionally, keeping the surface clean is crucial. Dust and debris can interfere with how smoothly the puck travels across the table. Regularly wipe down with a soft cloth and avoid harsh chemicals that might damage the finish. For stubborn spots, water mixed with mild soap usually does wonders.
- Choose high-quality materials like acrylic
- Regularly clean your playing field
- Avoid harsh chemicals
Another important aspect to consider is ensuring that your table’s airflow isn’t obstructed in any way. The tiny air holes need to remain unclogged so they can provide consistent lift for optimal play conditions. Every once in a while, gently use compressed air or even a vacuum on reverse setting to clear out these holes.
Maintaining an evenly balanced surface will dramatically improve play quality too, providing you with hours of fun where every shot feels just right.
All it takes is some regular care paired with premium materials and you’ll be amazed at how much better your games will feel!
Read also: arctic wind air hockey table
 how to build an air hockey table
Adding Scorekeeping Features to Your Air Hockey Table
Air hockey is thrilling, but adding scorekeeping features really amps up the fun. Imagine not needing to keep track of scores in your head; it’s a game-changer! Digital scorekeepers are incredible. They usually have bright LED displays that make it easy to see who’s winning, even in dim lighting. Some advanced models come with sounds and lights for added excitement when someone scores.
If you’re into DIY projects, you can also create homemade systems using simple electronics or apps on your phone. Here’s what you need:
- Sensors: Mounted at each goal to detect pucks.
- Arduino board: For processing signals from sensors.
- LED display: Shows the score.
These gadgets significantly enhance gameplay and ensure fairness while keeping everyone immersed in the action.
For those who prefer a more traditional approach, magnetic manual scorers are an option too. They often attach to the sides of the table and use sliding markers for tracking points. It’s straightforward yet effective, perfect for low-tech households or budgets! Whichever method you choose—digital or manual—scorekeeping upgrades add a layer of professionalism and excitement to every match. Your friends will be amazed by how much more engaging your games become with these thoughtful additions.
Conclusion: Enjoying Your Custom-Made Home Air Hockey Experience
Creating your custom-made home air hockey experience will bring endless joy and excitement to your living space. Imagine the thrill of competition as you and your friends gather around a sleek, personalized table designed to fit perfectly in your game room. The smooth surface and vibrant colors add a touch of elegance that enhances every match. With each swift puck movement, the soft hum of the air gliding beneath creates an immersive atmosphere that pulls everyone into the action.
Think about the endless possibilities for customization:
– **Table size:** Tailored dimensions ensure it fits seamlessly into any area.
– **Lighting effects:** LED lights can set various moods from intense competition to relaxed fun.
– **Scoreboards:** Digital or manual options keep track with style and precision.
Each feature adds a unique flavor tailored just for you.
When it’s all set up, you’ll cherish those moments spent laughing over close games or celebrating epic wins. It’s not just a game; it’s an experience. This is where memories are made, whether through casual play or heated tournaments. A custom-made home air hockey setup turns ordinary days into extraordinary experiences, making it more than just furniture—it’s part of what makes life enjoyable at home.
You may also like: What came first, ice hockey or field hockey?